Managing and translating documents can be a challenging and time-consuming task. With the increasing need for efficient workflows, automation has become a vital component of any business process.
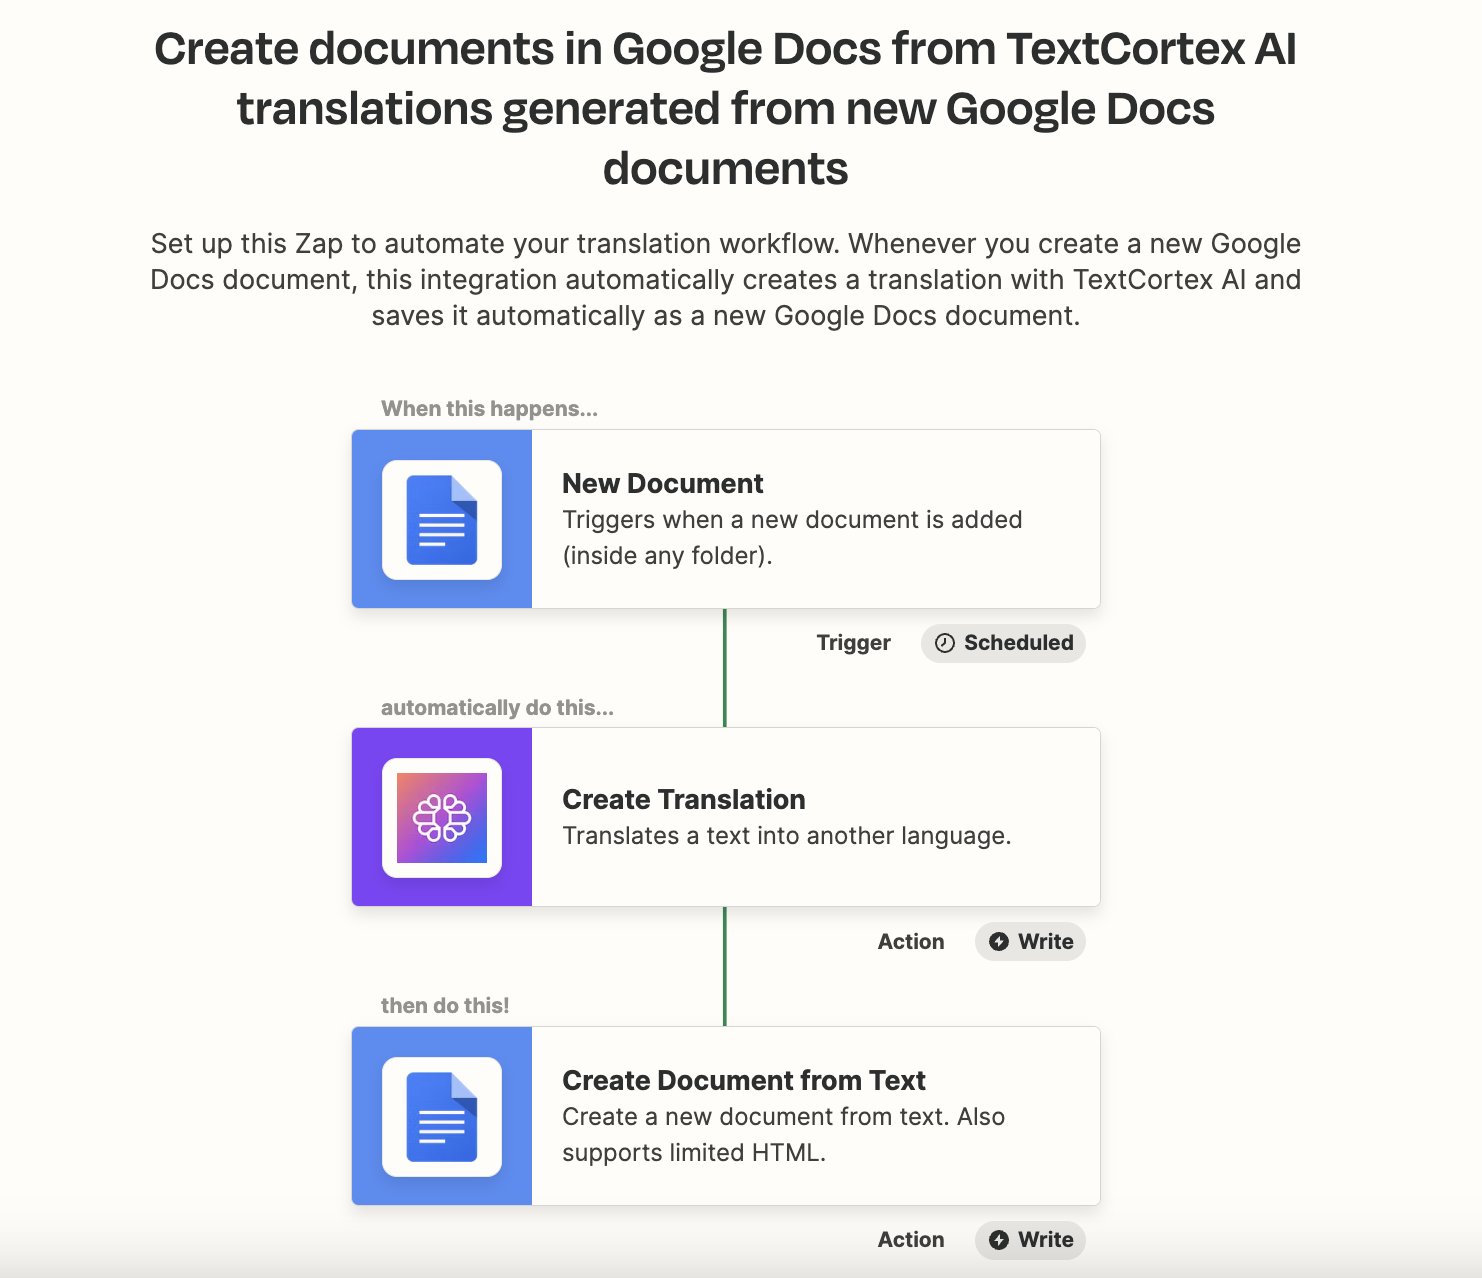
In this blog post, we will guide you through setting up a translation automation sequence using Zapier, Google Docs, and TextCortex AI. This powerful integration will save you time and effort, allowing you to focus on other important tasks.
Step 1: Triggering the Automation with a new Google Docs Document
The first step in our translation automation sequence is triggering the process when a new document is added to Google Docs. This is where you'll store your original text, which needs to be translated into the specified language.
Alternatively, you can also specify a particular folder you wish for this automation to keep track of. Then, when a new document is added / created in that folder, the automation will get triggered.

Step 2: Translating the Document with TextCortex AI
Next, the automation will utilize TextCortex AI integration, our advanced NLP API that generates human-like translations based on the provided text.
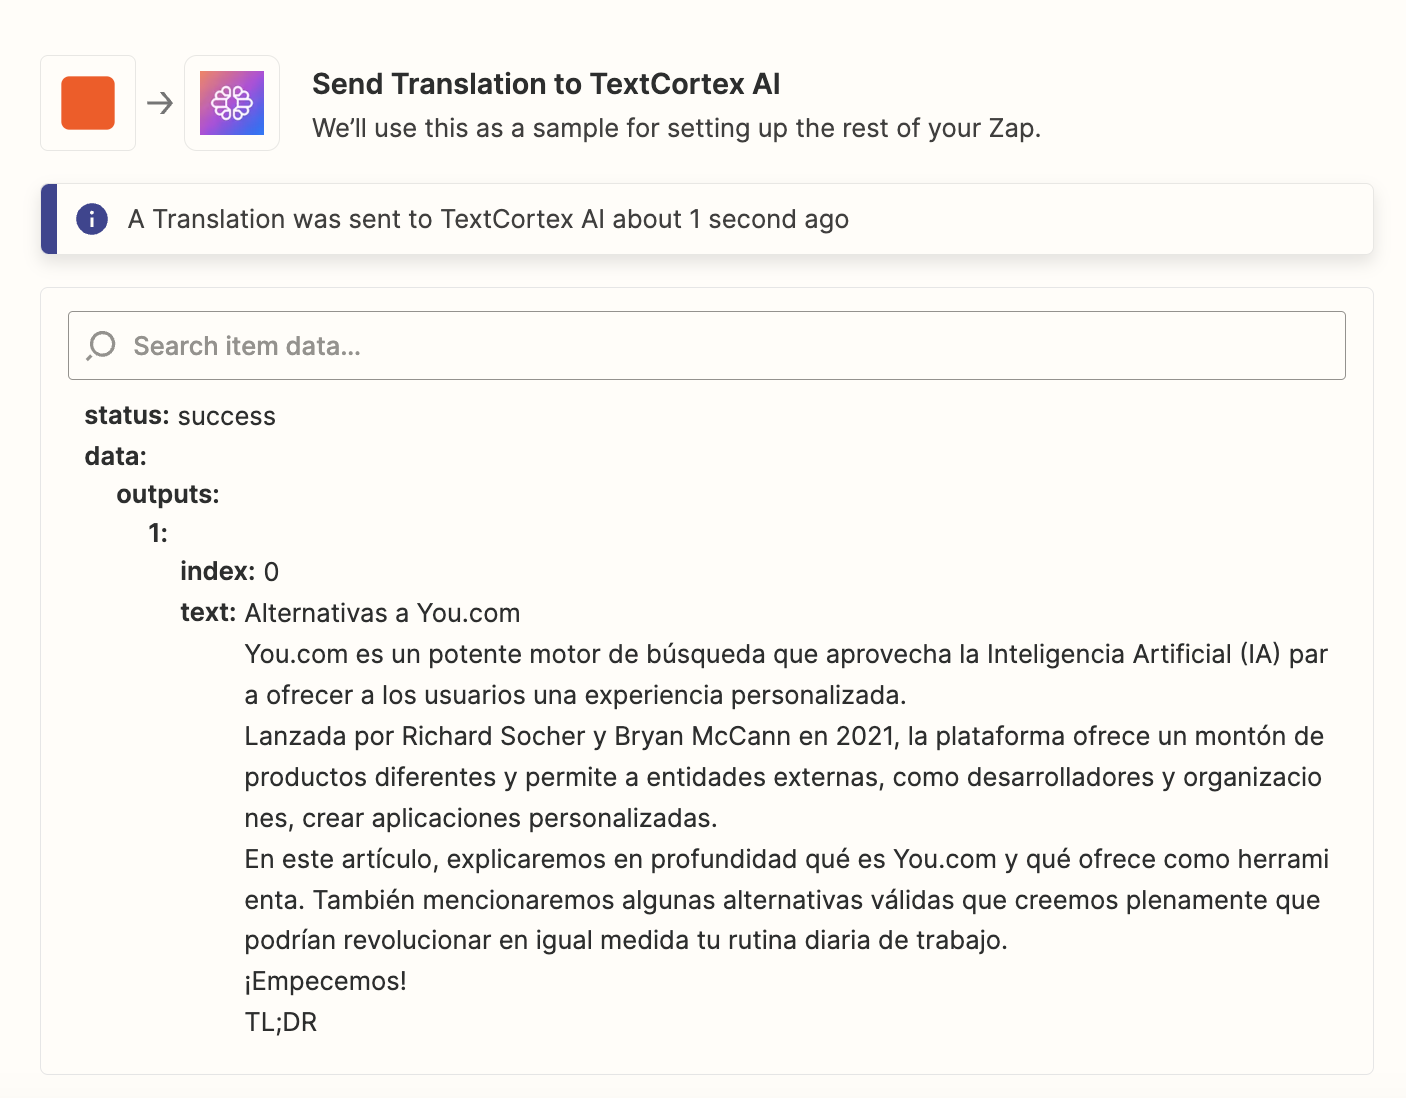
In this step, TextCortex AI will generate an accurate translation of the content in your Google Docs document into the specified language you set during the configuration.
In the following example, I translated one of our own blog posts named You.com Alternatives into Spanish. Once the data of the added file is received by TextCortex AI integration, the translation process starts.

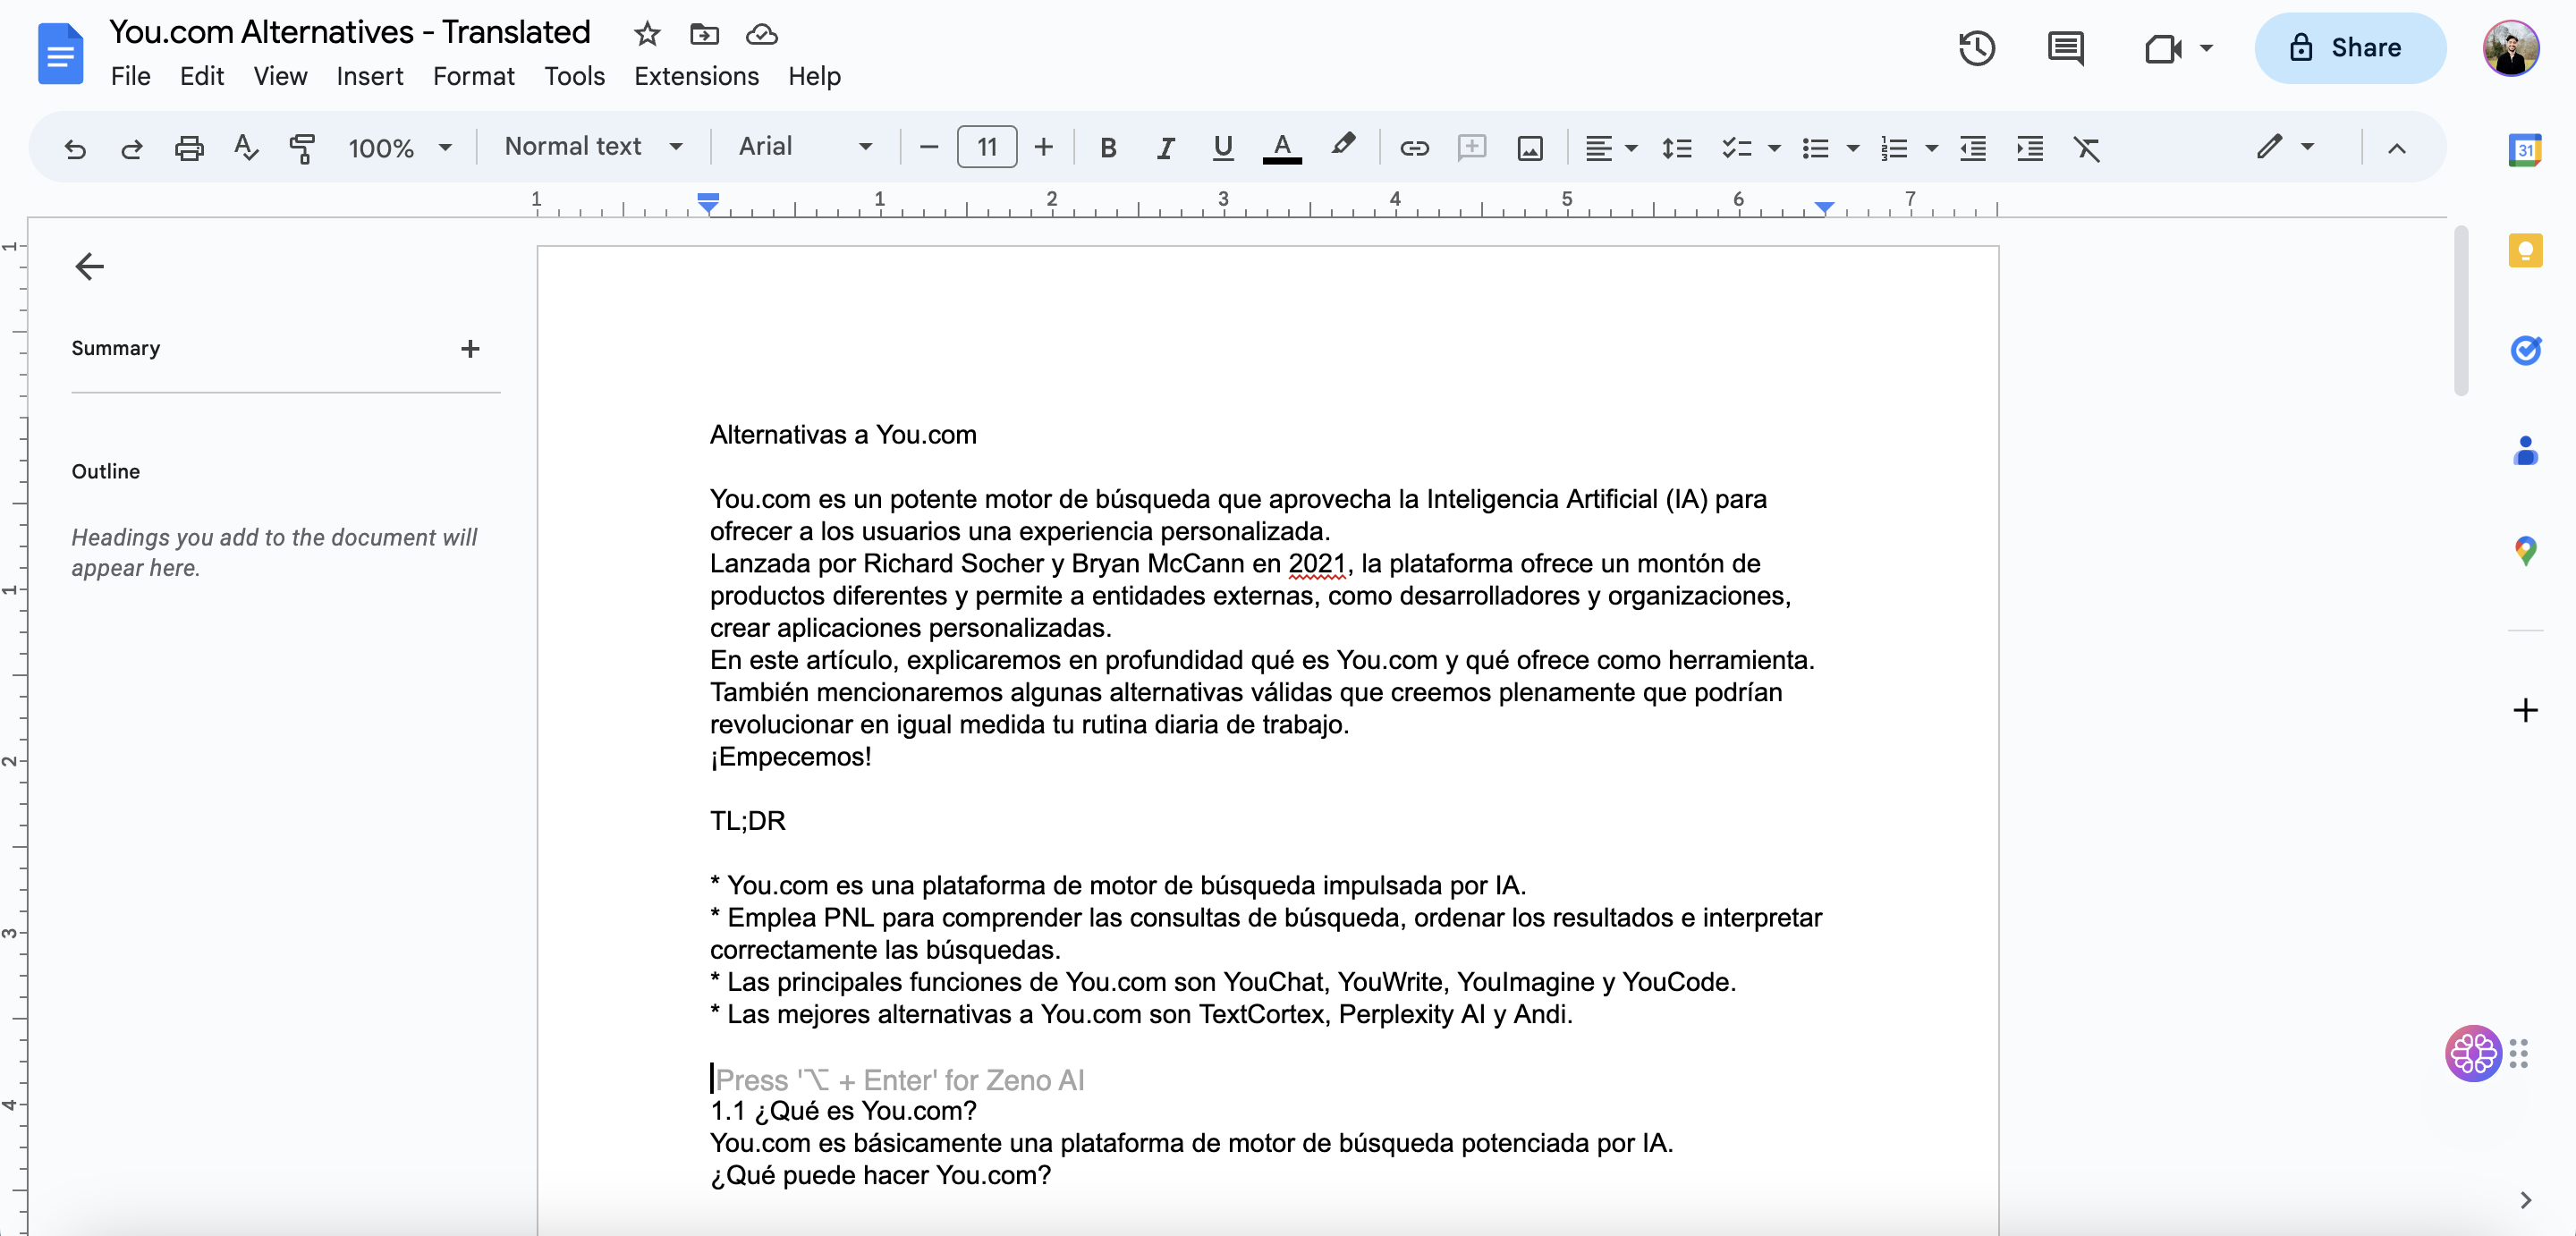
Step 3: Creating a New Google Docs Document with the Translated Text
Finally, the automation sequence will create a new Google Docs document containing the translated text generated by TextCortex AI. This streamlined process will help you manage your translations more efficiently and effectively and help you localize your content articles in no time.

Here's How to Set Up the Translation Automation Sequence On Zapier:
1. Click on "Use this Zap" to begin the process.
2. If you don't have a Zapier account yet, create a new one, or log in to your existing account.
3. Connect the relevant data points from your Google Docs to the automation sequence. These include specifying which folders are tracked for new Google Docs documents for the translation process and selecting the target language for the translation.
4. After connecting the necessary data points, publish the Zap to enable the automation sequence.
Conclusion
By integrating Google Docs, TextCortex AI, and Zapier, you can create a seamless translation automation sequence that simplifies your document management and translation processes. With this step-by-step guide, you'll be well on your way to improving your translation workflow with just a few clicks. Give it a try today and experience the benefits of automation for your business!

%20(6).png)
%20(7).png)
%20(5).png)
%20(21).png)