Writing a blog post is not an easy task.
You need to spend hours researching to create a perfect article that drives engagement, ranks in search, and transforms your readers into customers.
It can be pretty challenging.
Especially because you don't want to forget something important or stumble over what you are trying to say.
That’s where the blog article outline enters the game - to organize your thoughts and make this process easier.
But creating a perfect blog outline requires you to completely understand and set the content before even writing about it.
You need to ensure that everything follows a proper order, which means finding out what you should write and what comes last.
But don’t worry.
If you are passionate about creating great blogs that people love to read, creating a topic outline can be effortless if you follow some tips.
In today’s article, we’ll go through the 8 useful steps to write a blog article outline that will make your content well-structured and easy to consume.
So if you’re ready, let’s begin!
What’s the blog article outline?
It's the very foundation of your piece and serves as that essential scaffolding that helps you build upon it to craft your final draft.
While your blog post content should by most means take care of business, the article's structure and outline are also very important in keeping the blog audience informed and engaged.
Why’s the outline so important? Benefits of outline?
For most people, writing blog articles can be hard sometimes. But with a great outline, it will take away much stress for you and make it much easier.
You’ve probably, more or less. been thinking about these questions regarding the outline:
What is an outline for, why should you use it, and what are the benefits of an outline?
So here is what you should know:
1. An outline helps you organize your ideas to create a logical flow in your article. It's easier to write when you know what you want to say.
2. An outline allows you to identify the main arguments of your paper and separate them from unnecessary information.
3. When writing about a complex topic, it is easy to get lost in the details and forget about the bigger picture.
4. The outline helps you see the forest through the trees and stay focused on your main points. A well-structured article will attract more readers who will keep coming back for more!
The better your blog article outline, the better your article.
A good outline is a sign of a great content writer and will soon become an asset to you in your blog writing career.
But how do you actually write a good article outline?
What does it entail? We have the answer for you.
So, let’s reveal it.
8 Useful Steps To Write Blog Article Outline
1. Research your topic
Since you're writing an article, you probably already have a topic in mind.
But it's important to dig deeper than just the surface idea.
Take some time to research your topic before you start writing, and ask yourself these questions:
- Is there a lot of information out there about the topic?
- Is this a good topic for the type of article you are writing?
- Does the topic have enough content?
- Does it have too much content?
- Are there some things that need to be explained first before diving into the heart of the article?
These are all questions you should answer with careful research.
This involves a bunch of reading, watching videos, and talking to different people.
The more you read, the better an idea you’ll have of what you want to say. And the better an idea you’ll have of how to say it.
If you’re writing on a topic that other people are also writing about, it’s important to read their articles too.
Researching the subject matter for a blog post is one of the first steps in writing a blog article outline.
For example, if you're writing about your passion for fitness, you'll want to consider what makes you passionate about fitness, then write down all of your thoughts.
You may also want to check out some books on fitness or read articles that are related to your topic.
When writing a blog article outline, it's important to remember that your ideas should be original and not just a rehash of what someone else has already said.
By now, you should have a pretty good idea of what your article is going to be about.
2. Organize points in a logical flow
Creating an outline for your article can help you organize your thoughts and decide what order they should go in.
Your outline doesn't have to be complicated — it can be as simple as putting each paragraph topic on a new line and numbering them in the order they should go.
What are the most important points you want to make?
Blog posts can be divided into sections, so think about all the main points you need to cover, and then break them down into smaller subheadings.
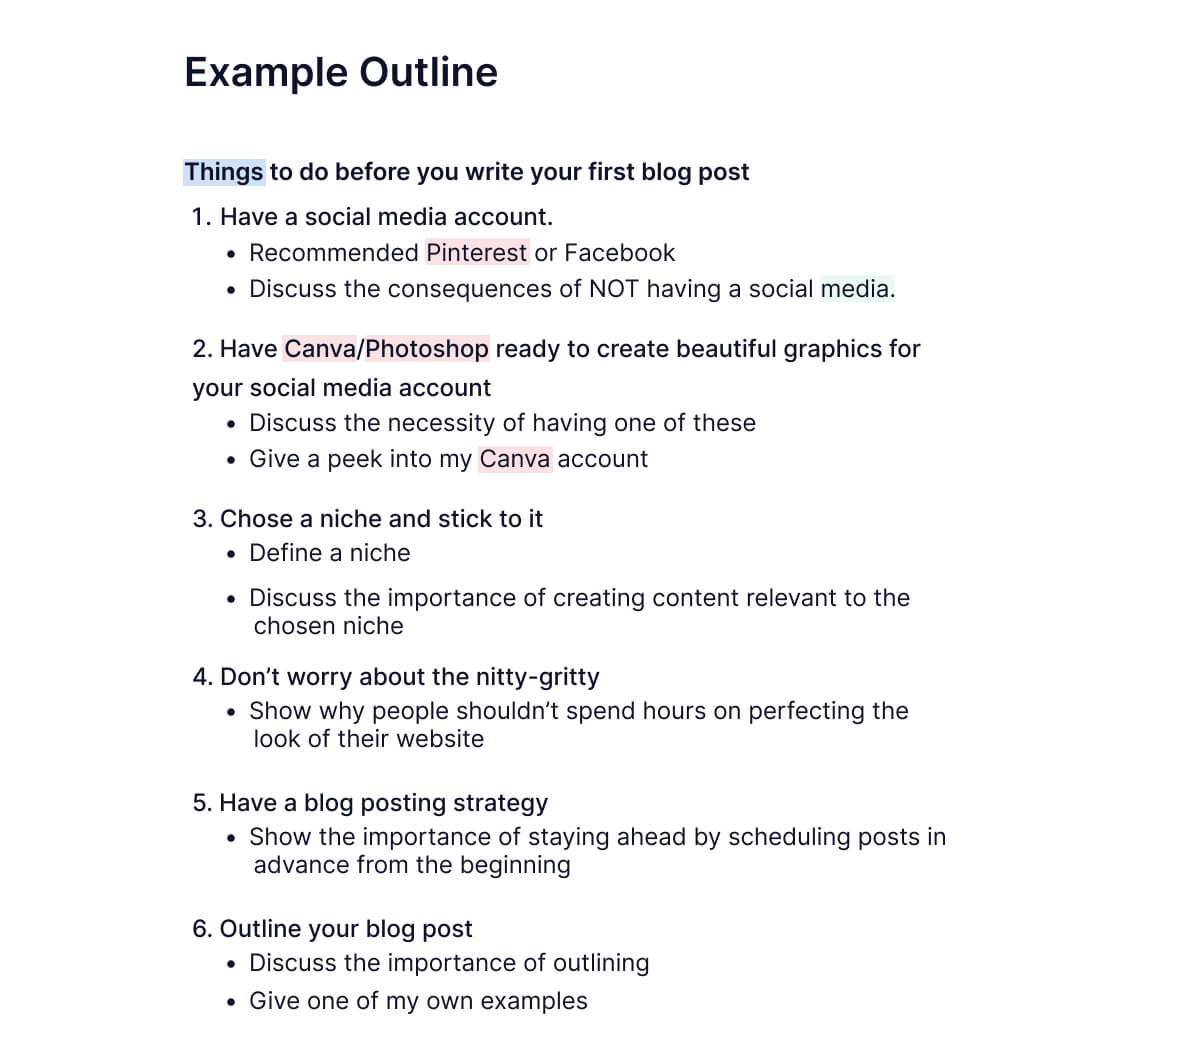
Once you have some ideas for your blog post, it’s time to start outlining your structure.
Outlines don’t need to be complicated — they help you organize your thoughts and understand how each point connects to another.
This is when you should think about how many paragraphs long your article is going to be and what each paragraph will talk about.
3. Figure out key takeaways of topic
Now that you know what you’re writing about and have a rough outline of how the post will flow, it’s time to figure out what the key takeaways are.
This is where you’ll decide what the main points or benefits will be in each section of your blog post.
To do this, I like to use a simple outline template like this:
- Key Takeaway:
- How to:
- So What?:
I like this template because it helps you find out what the key takeaway is for each section. After all, if you don’t know what the key takeaway is for your reader, they won’t either!
It also forces you to think about the “so what?” aspect of your content.
In other words, why should your reader care about this?
By giving them a good explanation on this question is what will make them be more satisfied with your article, so make sure to provide it.
4. Analyze top-ranking articles
In order to create a good blog article outline, you need to spend some time researching the articles that are already out there about your topic.
Not only to better meet the topic but to figure out what works and what doesn’t.
The first thing you want to do is look at the headlines of the top-ranking articles for your target keyword.
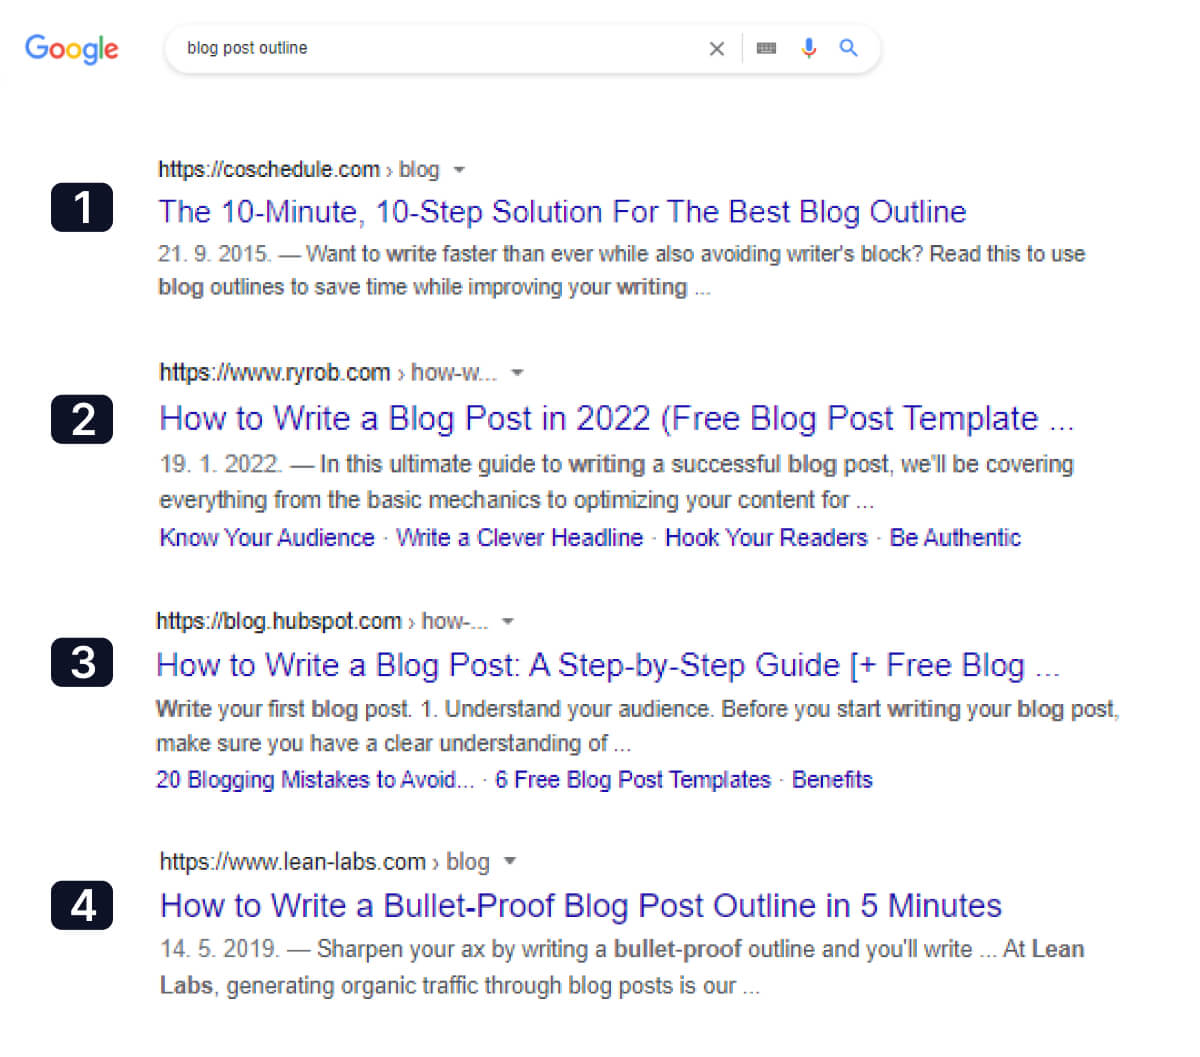
What can you learn from them? In particular, pay attention to which words they use and how well they answer the questions in your keyword research.
Next, skim through several of the articles and read the first paragraph or two of each one so that you can see how each begins their article.
What sort of language do they use? How do they entice readers in? Are there any big ideas that come up over and over again?
Pro tip: Take a look at a few of the comments on those articles. These can give you insight into what readers are particularly interested in learning about or curious about.
Finding high-ranking content and reverse-engineering the structure might help you create a great outline and article.
Just enter your topic into the search bar, and then analyze the whole first page on Google, and see which keywords are used in their titles, subheadings, and body copy.
This will help you create a better outline for your article.
6. Brainstorm and write ideas about what you’ll write about
You want to get all of your ideas on paper so you don’t forget anything.
This is where brainstorming comes into play.
Start by writing down all the ideas that come to mind, even if they seem far-fetched or unrelated to your topic at first.
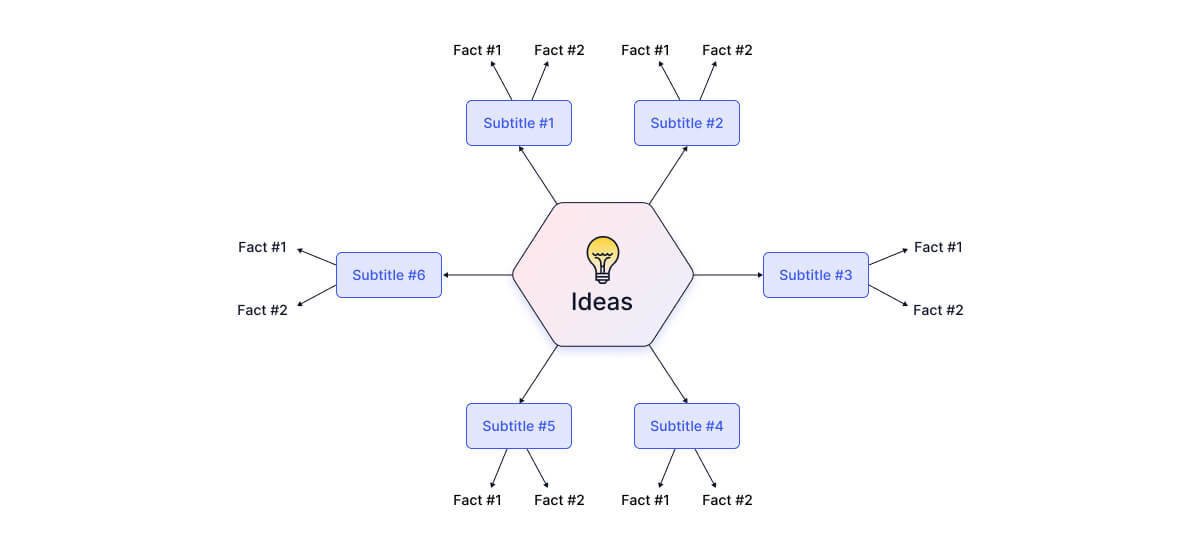
Once you have written the ideas down, organize them into different categories. This can be done by using bullet points or numbers.
After categorizing all the main ideas, add subtitles to each of them.
Add as many details as you think are necessary and also add any visual elements that you may need, such as images or charts if applicable.
Then choose the strongest ideas and use them as the basis of your outline.
For example, if you're writing about a new restaurant, try writing down thoughts like “the food was delicious” or “the location is great!”
You can also start by making a list of questions you have about the topic, such as “what dishes should I order?” or “where should I park my car?"
Once you’ve got some ideas down on paper, group related topics together and organize them from most important to least important.
For instance, if you were reviewing a new restaurant, you might want to start with a section about the food and then move on to topics like service, decor, and parking.
Then, underneath each section heading, jot down bullet points about what you want to include in each paragraph.
7. Insert relevant studies and data
As you write down your ideas as they come to you, it’s good to add supporting evidence in the form of facts, quotes, and graphs from experts in the field.

If you're writing a "flow" style outline, add your main points in the right order, and include bullets and sub-bullets if you're writing a "structure" style outline.
After you write an argument, you should summarize it in a few sentences and then add your final thoughts.
This makes your article more alive. Expressing your own thoughts will make your readers relate to what you’re writing about and will get them more attached to your articles.
8. Start writing
After you have completed your blog outline, you should go to the content editor of your choice and begin filling in the outline.
A content editor and an outline document should always be side by side.
It may be helpful to use (CMD+Tab) to cycle between the editor and the outline if you feel distracted while writing with the outline open.
You should also zoom in on the section you're working on - in your outline app - to avoid becoming overwhelmed with the size of the outline.
When you have a detailed outline in place, you will be amazed at how quickly a blog post can be written.
If you are outsourcing your content team, they’ll be able to deliver more quality work at a much lower price for you - in case half of the research is already done for them before writing.

Conclusion
When you have a clear blog article outline, writing it is much easier! You can just write down the main ideas and points you want to develop as they appear in your outline.
You’ll save yourself time by not doing research while writing because you’ve already done it.
Your readers will be more inclined to read your article to the end because it’s well organized and the content flows well from one point to another.
I hope this article on how to write a blog article outline will help you improve your content quality.
To help you create more content that includes all these rules and ranks high on Google, we created TextCortex.
TextCortex is an AI writing tool that saves up to 70% of your time and money by creating content in seconds.
How does it work?
While other AI writing tools use GPT-3 for every kind of content in a one-size-fits-all approach, we train smaller expert AIs on the specific use case.
TextCortex trains its use-case modules with 3 billion sentences to write unique, high-quality content on different topics, formats, and features.
Not only TextCortex follow all these rules for writing easy-to-read articles, but our creators lead to higher relevancy while significantly impacting the quality of your output.
How to use TextCortex to create compelling outlines and blog posts?
After you sign up, navigate to any textbox online and hit "Ctrl + Shift + K" to enter Zeno mode.
Choose the "Outline", enter the input, and hit "Generate."
Here you’ll find different templates that the TextCortex web app provides you with, so click “Blog wizard” to enter the blog post creation workflow.
Here, you need to enter what your blog post is about and what industry, and after you click “Continue” and choose the title that fits you most, you’ll come to an outline section.
Not only you’ll get different variations of outline, but based on your outline choice, you’ll be able to create your whole article within seconds.
It’s easy as that.
To improve the output results, all you need to do is add some context and additional information to your input, or you can rewrite parts you don’t like within the blog post.
Just highlight the sentence or paragraph you want to paraphrase, and hit the “Rewrite” option.
With the TextCortex Chrome extension, you can drastically improve your blog posts’ quality, leads, and conversions, and you can try it for free with 15 daily creations to see if it fits your needs.
Not only will it help you create a lot of content, but you will also make a lot of time and money savings for your business.
This AI tool supports your writing team, so you can easily automate and scale the whole content production process.
Don’t spend that much time and money anymore writing your content.
Let TextCortex do it for you.
While you focus on business, let your content write itself using TextCortex.
Download the TextCortex Chrome extension for free and see how it skyrockets your content creation instantly. 🚀
.jpg)

.jpg)

